
How to install the PCI Linx application
Deploying PCI Linx
The recommended deployment method for PCI Linx is on a Windows 11 computer connected to Microsoft Azure / Entra. The database can be deployed on-premises, Microsoft Azure or Amazon AWS.
The PCI Linx application deploys efficiently on correctly configured Virtual Machines (VMs). This method of installation is commonly used by many of our clients with support from their IT Department. We unfortunately cannot support installation on Virtual Machines.
Installation Prerequisites
Windows 10 Version 2004 Build 19041 or higher is required, you will receive a PARSE ERROR if your machine is of a lower build. The app is fully supported on Windows 11.
Minimum 16Gb of memory.
As a customer of 27k1 Ltd., you will need to set up a database to store the PCI Linx data. The database server can be on-premises SQL Server Database (Express), Microsoft Azure SQL Database or a SQL Server Database residing on Amazon AWS.
The PCI Linx application is digitally signed with a GlobalSign certificate. You will not receive any certificate security warnings. If a warning is received immediately contact support@27k1.com
If the application is installed on a Virtual Machine, the VM must have a Windows user account or be connected to a domain.
Firewall
The following URLs require to be whitelisted on your firewall.
License key
app.cryptolens.io - Port 443
The CryptoLens API is essential for the application to function, the PCI Linx application is protected with scope based access tokens for all API calls to the CryptoLens licensing system.
App updates
The PCI Linx application checks the 27k1 web server's security certificate to ensure the update package is installed from a valid subdomain i.e. "pcilinx.27k1.net". A security certificate is exclusively assigned to this subdomain.
Installation packages
The full set of installation packages are available for download from this link.
https://pcilinx.27k1.net/fullinstallationpackage/PCI Linx.zip
Step 1. Download the app installer file.
Step 2 - Installing PCI Linx.
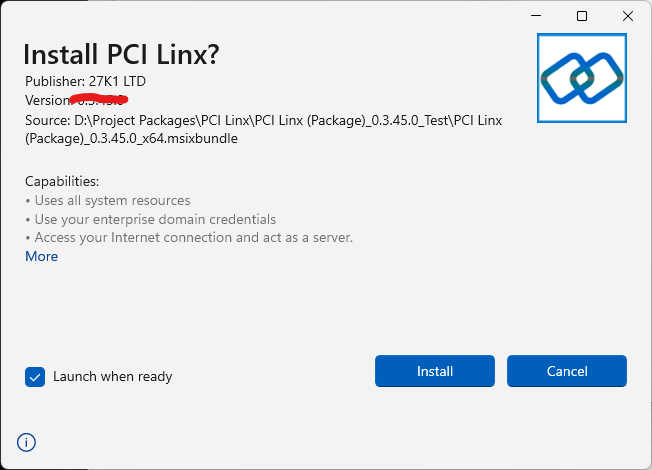
After double clicking 'PCI Linx (Package)_x.x.x.x_x64.msixbundle' the below dialog will show.
Please note that this application has no association with the Microsoft Store, if errors occur further investigation will be required.
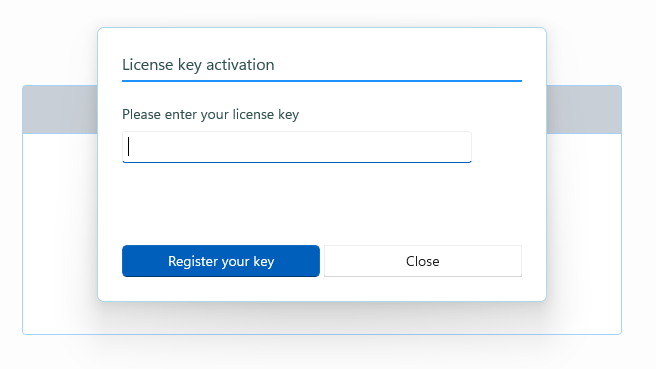
Step 3 - Enter your license key
Enter the license key provided in the email you received when your account was opened.
Click "Register your key"
If the key is accepted, click "Close", you are then presented with the database configuration page.
Step 4 - Connect PCI Linx to an SQL Server data source
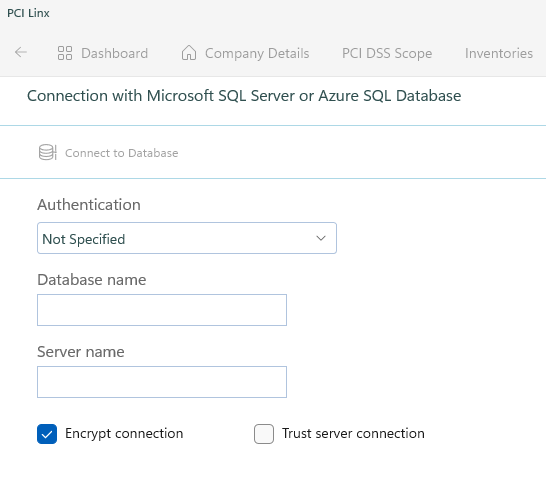
Enter the database name and server name which are obtained from your Azure portal SQL Database / Connection strings.
Click "Connect"
If successful, close and re-open the app.
PCI Linx is now connected to the Azure SQL Database and you are ready to start enjoying using the app.