
How to configure Azure SQL Database
This is a guide is a basic configuration for Azure SQL Database to connect the PCI Linx application.
- Please be aware that configuration may differ between regions.
Before you start
It is very important that these requirements are in place before commencing with this procedure.
- You need to have 'Server admin' access to the Azure SQL Server.
- You should have experience with configuring SQL Database users with multi-factor authentication (MFA) as a minimum requirement.
- Each PCI Linx user will need to be created and permissions granted to gain access to the database. Refer to Steps 14.4 and 14.5 at the bottom of this page for guidance.
- You need access to the Azure SQL Server using SQL Server Management Studio.
- Please be aware of the Microsoft SQL Database pricing tiers.
If these requirements cannot be met, consider installing SQL Server Express locally on your computer as a temporary measure. This database can easily be exported to your Azure SQL Database at a later date using SSMS.
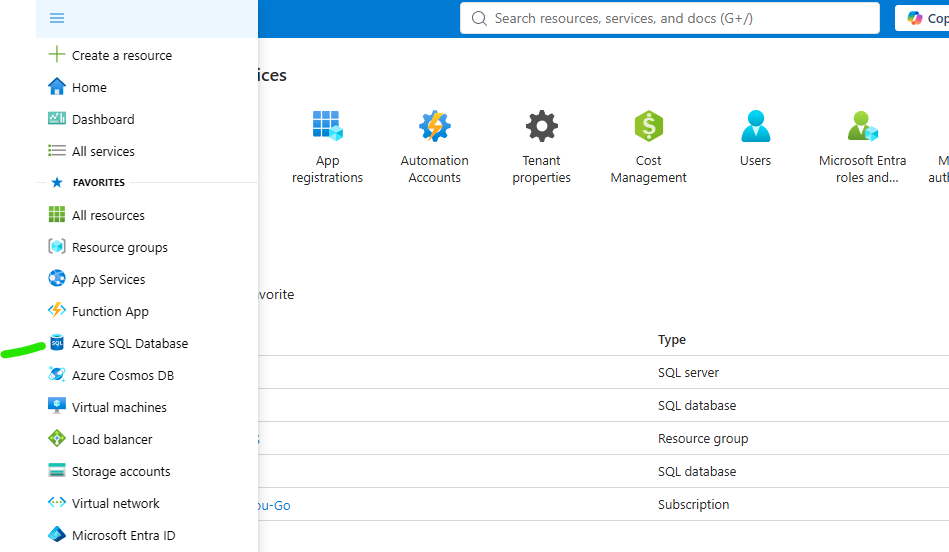
STEP 1 - Select SQL Databases from the menu of your Azure Dashboard
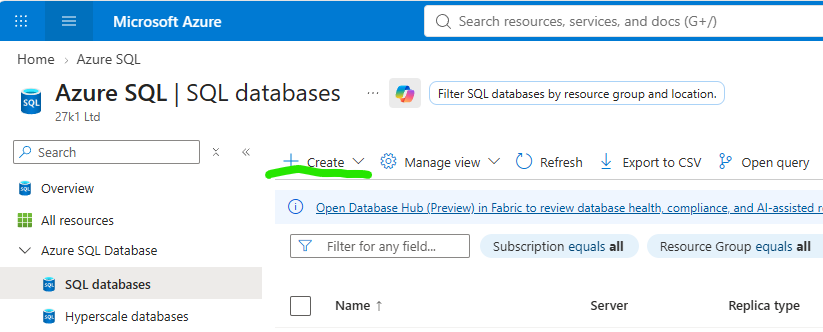
STEP 2 - Create a new database
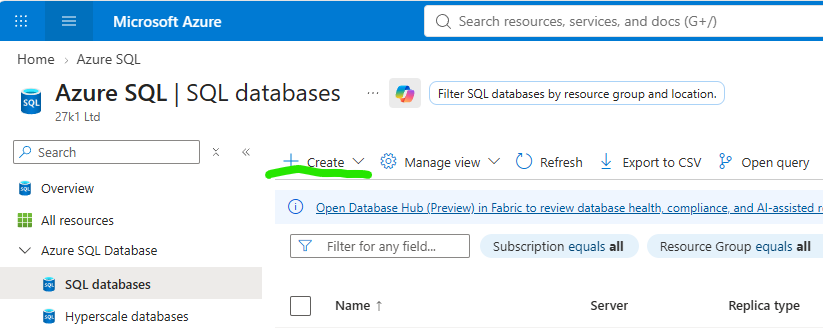
STEP 3 - Configure database (basics)
- Create a new resource group if one does not exist and provide a suitable name.
- Enter a new database name with no spaces e.g. PciLinx
- Create a new server if it does not exist instance and enter the credentials.
- Choose the default Location where your data will be stored.
STEP 4 - Create SQL database server (if required)
If not configured then configure a new SQL database server.
- Select a suitable location
- Select an Authentication method in accordance with your policies.
- Ensure the admin login password is very string with at least 15 characters of various types.
- Please note that the admin account must not be used for access from the PCI Linx application.
STEP 5 - Create the database
- Work through the tabs to create the database
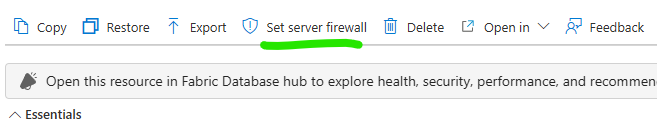
STEP 6 - Set the Azure firewall for your IP Addresses
Click "Set server firewall" as shown in the step above.
The IP Address of your location is shown, copy paste this IP Address or your known IP Address range to the Start and End IP with a suitable reference.
If this is not configured, PCI Linx will display a message to advise you when you try to connect.
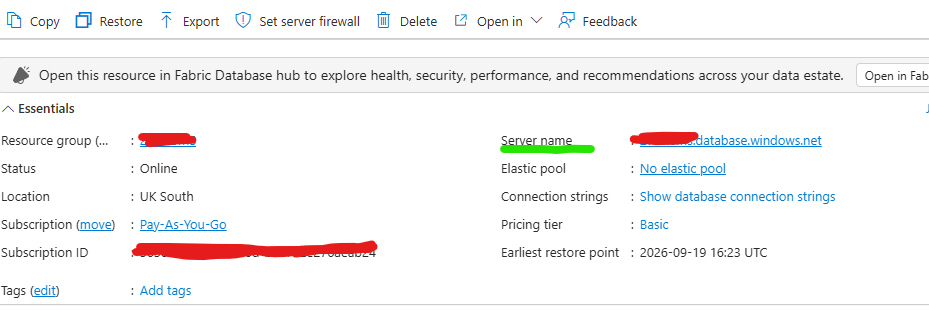
STEP 7 - Gather the credentials
Return to the the Azure dashboard and select the PciLinx database, or the name of the database you have chosen.
Record the "Server name" which is the server name required in the PCI Linx application when configuration the database connection.
STEP 8 - Download and install SQL Server Management Studio (SSMS)
Download, install and setup and install SQL Server Management Studio from the following link
https://learn.microsoft.com/en-us/ssms/install/install?view=sql-server-ver15
Note: If the SSMS with the configured user can access the database then PCI Linx should also be able to access the database.
STEP 9 - Guidelines to allow a 27kl RMS user access to the database using MFA.
The PCI Linx application initially builds the database structure with tables and content. App updates may also require database changes from time to time. It it therefore important to allow the correct permissions for the Azure User.
The following procedure will assist you in configuring these permissions, ensure that the configuration complies with your IT processes.
STEP 9.1 Connect to your SQL Database with SSMS as an Administrator
STEP 9.2 If required, create an SQL Service Principle login from master (Select New Query then 'master' in the drop down).
-- create SQL auth login from master
CREATE LOGIN rmslogin
WITH PASSWORD = 'VeryStrongPassword!'
STEP 9.3 If required, create a User mapped to a Login (Select New Query then your database name in the drop down).
-- create a user mapped to a login

CREATE USER [rmslogin]
FOR LOGIN [rmslogin]
WITH DEFAULT_SCHEMA = dbo;
-- add user to role(s) in db
ALTER ROLE db_datareader ADD MEMBER [rmslogin];
ALTER ROLE db_datawriter ADD MEMBER [rmslogin];
STEP 9.4 If required, create a Contained User (Select New Query then your database name in the drop down).
-- select your db in the dropdown and create a contained user

CREATE USER [rmslogin]
WITH PASSWORD = 'VeryStrongPassword!',

DEFAULT_SCHEMA = dbo;
-- add user to role(s) in db
ALTER ROLE db_datareader ADD MEMBER [rmslogin];
ALTER ROLE db_datawriter ADD MEMBER [rmslogin];
STEP 9.5 Create a Contained Microsoft Entra User (Select New Query then your database name in the drop down).
-- select your db in the dropdown and create a contained Microsoft Entra (Microsoft 365 user name)
CREATE USER [usersname@mydomain.com]
FROM EXTERNAL PROVIDER
WITH DEFAULT_SCHEMA = dbo;
-- add user to role(s) in db
ALTER ROLE db_datareader ADD MEMBER [rmslogin];
ALTER ROLE db_datawriter ADD MEMBER [rmslogin];
STEP 9.6 Assign permissions to the User (Select New Query then your database name in the drop down).
-- select your db in the dropdown
EXEC sp_addrolemember 'db_owner', [usersname@mydomain.com];
